
Quick check — suit up with gloves, eye protection, and an N95, make sure the unit’s been cold 24+ hours, and shut off fuel before you start. Scan the cap, crown, and flashing for ice, debris, or cracks, tap bricks for spalling and missing mortar, and sniff and soap-test gas fittings for leaks; clear light snow with a plastic shovel, dry metal, and reapply rust protectant. Stop for smoke, strong gas odor, or visible liner damage — call a pro, then keep going for more tips.
Some Key Takeaways
- Confirm the unit is fully cold for 24+ hours, wear PPE (gloves, ANSI glasses, N95, non-slip boots) and check weather before inspecting.
- Visually inspect chimney cap, flue opening, and crown for ice, nests, or debris; clear gently and stop if damage or heavy ice present.
- Perform a smoke-draft test with a smoldering paper; if smoke lingers or backflows within 10–20 seconds, close damper and call a pro.
- Examine gas lines, valves, and fittings for deterioration and perform a soap-bubble leak test; stop use and call a technician if bubbles or hissing appear.
- Look for glazed creosote, loose soot, or spalling masonry; ventilate, avoid relighting, and schedule a CSIA/NFI professional cleaning or camera inspection.
Assess Safety Before You Start: Personal PPE and Weather Considerations
Before you even think about lifting a cover or sticking your head into the firebox, take a breath and make safety your first move — you’ll work smarter and feel better doing it. Heading out, Wear PPE: heavy gloves, ANSI-rated safety glasses, a fitted N95 or better, and non-slip insulated boots, so you feel protected and part of the crew. First, check weather conditions — don’t inspect in rain, high winds, or bitter cold that makes parts brittle. Confirm the unit’s been fully cold for at least 24 hours, look for no glowing embers, then use a flashlight and long-handled mirror from a distance. If icy, clear a stable perimeter, salt walkways, and get help lifting covers. Progress, not perfection. Consider investing in a durable fire pit cover to protect your unit between uses.
Confirm Fuel Status and Shutoff: Propane, Natural Gas, or Cold-Dry Wood
If you’re winterizing or just checking things off your seasonal list, start by confirming exactly what fuel your fireplace uses and where the shutoffs live — it makes everything safer and simpler later on. Propane systems need a clear plan: either run the tank empty or leave it full for storage, never half-full, then shut off the tank valve, label it, photograph it, and if you remove the cylinder store it upright in a ventilated, weatherproof spot away from the house. For natural gas systems, close the outdoor appliance service valve, keep the main supply accessible, document positions, and do a soap-bubble leak test on exposed fittings — bubbles mean shut it down and call a pro. For cold dry wood, stack off the ground, covered, and keep it three feet from the bowl. Also consider adding simple drainage solutions around the patio to keep the area dry and protect your fireplace storage.
Check Chimney Cap, Crown, and Flashing for Ice, Debris, and Cracks
When you head up to the roof to check your outdoor fireplace’s chimney, cap, crown, and flashing, take it slow and look for the small things that turn into big problems — ice-packed caps, leaves and twigs jammed in the screen, hairline cracks in the crown, or seams in the flashing that are lifting. Quick check: clear snow and ice buildup from the chimney cap with a soft brush, never chip at frozen spots, and remove debris that blocks airflow or makes smoke backdraft. Scan the crown for tiny cracks, because water gets in, freezes, expands, and worsens damage. Inspect flashing at the roof junction for gaps or rusted fasteners; gaps mean leaks. If you spot problems, call a pro — sooner, not later. For homeowners, routine care helps preserve your outdoor fireplace and maintain a cozy patio space with fire bowl maintenance performed seasonally.
Inspect Masonry and Mortar Joints for Spalling, Missing Mortar, or Hairline Cracks
Take a good look at the brick and mortar around your outdoor fireplace, because small flaws left alone turn into messes later — tap suspicious bricks with the handle of a screwdriver or your knuckle to catch spalling (that hollow or flaky sound), scan the joints for gaps wider than about 1/8 inch, and note any hairline cracks that are less than 1/16 inch but could widen with freezes and thaws. Heading: what to watch for. You’ll spot spalling as flaky or powdering brick, and missing mortar where joints have receded, both invite water and faster decay. Action: mark and photograph any damaged mortar joints, missing mortar, or hairline cracks, then arrange repointing or brick replacement if inner masonry’s exposed. Progress, not perfection — catching issues now saves time and keeps your space cozy. Consider adding a cozy patio layout with brick pavers to complement the repaired fireplace and enhance your outdoor living area.
Look for Water Entry Signs: Stains, Efflorescence, and Interior Damp Spots

Look for water entry like a detective—scan ceilings and walls near the fireplace for brownish streaks or damp patches, because those stains usually mean water’s getting past the chimney or flue and into your home. Heading: What to watch for — water stains on interior drywall, brown streaks on masonry, and any soft or crumbling mortar tell you moisture’s been at work. Heading: Signs outside — efflorescence, that white powder on bricks, shows salts lifted by moving water, check near the chimney cap and flashing after rain. Heading: Inside clues — peeling paint, bubbling wallpaper, musty smells all point to interior dampness. Take notes, take photos, share with your trusted repair person, small fixes now save big headaches later. Also consider whether nearby outdoor surfaces could benefit from concrete resurfacing to reduce water pooling and protect adjacent masonry.
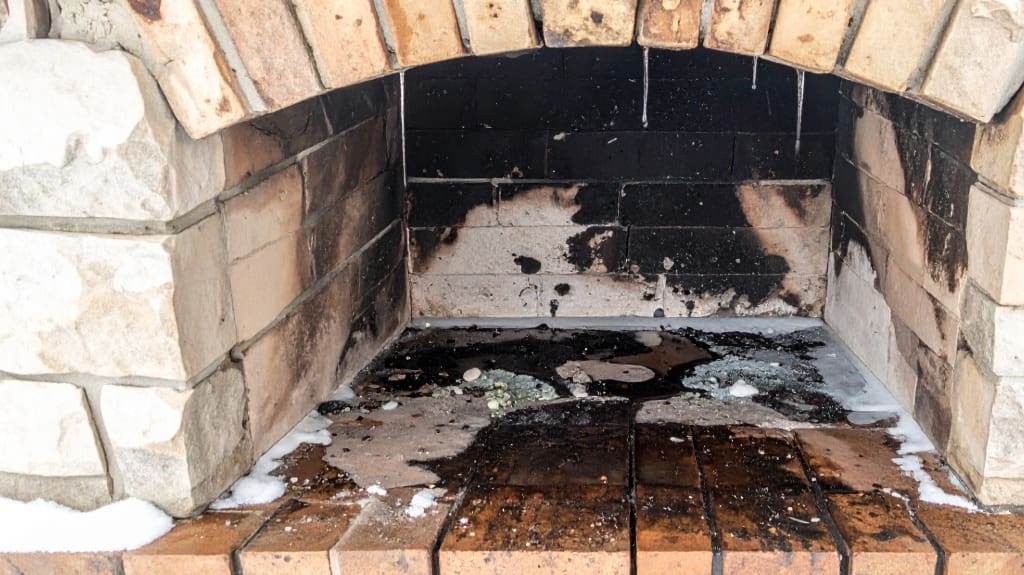
Examine the Flue Liner and Chimney Interior for Creosote, Soot, and Animal Nests
Check the flue liner and chimney interior with a flashlight or ask for a camera inspection, because flaky, shiny, or tar-like creosote and loose soot will build up over time and can spark or block airflow. You’ll also want to look for bird nests, wasp/rodent debris, or leaves — even small obstructions can send smoke back into your space or raise carbon monoxide risk, so don’t ignore them. If you see glazed or tarry deposits, cracks in the liner, or persistent soot falling into the firebox, stop using the fireplace and call a CSIA- or NFI-certified pro for a proper sweep and repair. Consider adding a chimney cap to help prevent nests and debris from entering the flue.
Creosote And Soot Buildup
Often you’ll want to inspect the flue liner and chimney interior at least once a season, because creosote and soot can build up faster than you expect, especially during cold months when you’re burning a lot. Heading into creosote buildup, you’ll look for powdery soot, shiny glazed patches, or hard tar‑like layers that mean trouble, and soot and creosote left unchecked will cause smoky smells and soot fallout. For a basic chimney inspection, use a flashlight and mirror or a camera, note any glazed or tarry creosote, and schedule a sweep if you see about 1/8 inch or shiny deposits. If smoke backs in or flames act odd, stop using the fire and call a CSIA‑ or NFI‑certified pro. Progress, not panic. For help choosing outdoor fire features and accessories for safe patio use, consider options for cozy fire pits that fit your space and needs.
Animal Nests And Debris
You’ve handled creosote and soot, now take a quick look for animal nests and loose debris that can block the flue and ruin a good burn. Friendly check: shine a flashlight and use a mirror to scan the flue liner and chimney interior, you’ll spot twigs, leaves, or shredded nesting material right away. If you see flaky soot, shiny tar-like creosote, or anything ≥1/8 inch, it needs to be cleaned, and you’ll want a chimney sweep for safety. Smell mustiness or see smoke backing into the seating area? Stop using the fireplace and call for an inspection. After removing nests or heavy deposits, get a CSIA- or NFI-certified pro to camera-inspect the liner, so your next fire feels safe and shared. Also consider adding a fire pit grate to your patio setup to help contain embers and improve airflow for safer, more efficient burns.
Test Draft and Smoking Behavior: Quick Checks to Detect Blockages
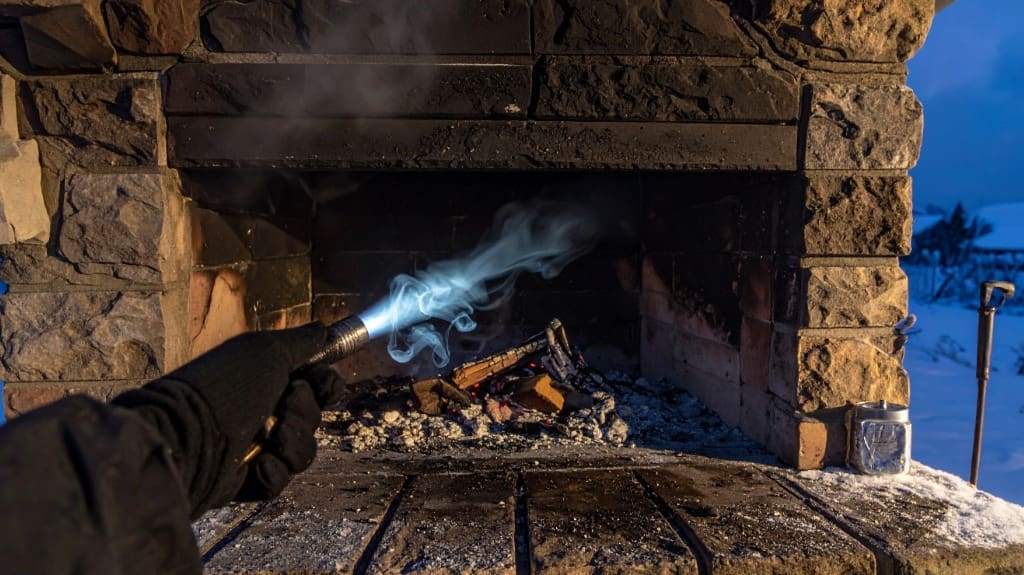
Test Draft and Smoking Behavior: Quick Checks to Detect Blockages — Start by watching how smoke moves when you hold a smoldering scrap of paper just inside the firebox; if it doesn’t pull straight up within a few seconds, or if flames sputter and smoke lingers, you’re likely looking at restricted flow or buildup. Take a quick look at the chimney cap and flue opening for leaves, nests, or ice, and try the smoke test again with big indoor fans off and on, since house pressure can trick you into thinking the flue’s the problem. If smoke patterns, odd soot, or a stubborn odor show up, stop using the fireplace and call a pro to find and fix the blockage — better safe than sorry.
Smoke Behavior Observation
Smoke behavior gives you fast clues about how your outdoor fireplace is breathing, and a quick, simple check can save you headaches down the line. Observe a smoke-draft test by lighting a rolled paper in the firebox and watching for smoke to go straight up the flue within 10–15 seconds; if it lingers or backflows, you’ve got a problem, likely partial blockage or poor draft. Notice persistent indoor smoke or a smoky smell, weak flames, or soot around the opening—those signs often point to creosote buildup or an obstruction, and they cut heat and safety. If the test fails, ventilate, stop using the fire, check damper and cap for obvious issues, and book a professional chimney inspection. Regular maintenance helps keep your gas fire pit and surrounding patio area safe and enjoyable, especially for homeowners who use outdoor spaces frequently and value cozy outdoor evenings.
Draft Test Procedures
Quick checks you can do yourself will tell you a lot about how your fireplace is breathing, and they’re the kind of small steps that often stop a bigger headache later. Draft Test Procedures — start with a simple smoke-draft test: light a smoldering wad of newspaper just inside the firebox, watch for smoke to rise straight up within 10–20 seconds, and note if it stalls or comes back. Check the damper fully open, repeat the test, and be honest about draft problems in cold weather — outside air can flip things. Peek at the chimney cap for nests, leaves, or ice before testing, since visible debris is quick to fix. If backflow persists, consider a cap and flue camera check, creosote buildup may need pro cleaning. Many homeowners find that adding an outdoor fire column or other patio feature improves airflow awareness and outdoor comfort.
Flue Blockage Indicators
Flues can act up for a lot of small reasons, and when they do you’ll usually notice it in the way your fire breathes and the way the room smells — so start by paying attention. Quick check: light a small wad of newspaper and do a smoke-draft test, watching whether smoke goes up the flue or spills back into the room. If smoke lingers, or flames look weak, yellow, or jumpy, that often points to creosote buildup, trapped moisture, or debris narrowing the passage. Musty or stale odors when you open the damper mean something’s holding damp or a nest is present. If you suspect blockage, close the damper, ventilate, avoid relighting, and Schedule a Professional for a certified inspection.
Inspect Metal Components: Grates, Dampers, Caps, and Spark Arrestors for Corrosion
Because metal parts take the brunt of heat, weather, and a little neglect, you’ll want to give your grates, dampers, caps, and spark arrestor a careful once-over, sooner rather than later. Chimney work can feel intimidating, but you’re not alone—inspect metal grates for surface rust, pitting, or flaking, and know deep pits mean replacement. Test dampers and linkages for smooth movement, watch hinges and seals for rust that breaks the smoke-tight seal. Peek at caps for dents, holes, or weld corrosion, since a bad cap lets water in and speeds flue damage. Check the spark arrestor mesh for clogged fibers or perforations—holes over 1/8 inch need replacement. Treat light corrosion with protectant, schedule fixes for anything compromised. Progress beats perfection.
Verify Gas Lines, Regulators, Valves, and Ignition Systems for Leaks and Damage
Now that you’ve checked the metal parts, it’s time to look at the stuff that actually feeds and lights the fire, since even a small leak or a finicky igniter can turn a cozy evening into a big headache. Quick check-in: walk around the unit, look at gas lines, regulators, and flex hoses for rust, dents, or hardened rubber, swap anything older than ten years, and note tank or regulator dates. Test for leaks using a soap-bubble method—turn ignition off, apply soapy water, open gas briefly, and treat steady bubbles as a confirmed leak. Cycle ignition systems and safety controls to confirm reliable spark, steady pilot, and proper shutoff, then run low-to-medium and sniff for hissing or odd smells. Progress, not perfection.
Evaluate Structural Fasteners, Welds, and Support Connections for Integrity
Structural fasteners, welds, and supports are the bones of your outdoor fireplace, so if they’re shaggy or loose, everything else becomes risky—think panels sagging, parts separating, or worse, collapse. Quick Check: inspect fasteners visually for rust, pitting, or thread loss, and swap any with over 20% damage or that won’t tighten. Check weld seams for hairline cracks, flaking, or rust-through; any crack >1/8″ needs a pro. Test support brackets and mounting plates by hand pressure, if a connection moves more than 1/8” it’s compromised. Use proper grade hardware, avoid mixed metals that eat each other, and record torque values as you retighten to specs or common ranges. You’ve got this—small fixes now prevent big problems later.
Clear Snow, Ice, and Debris Safely and Reapply Rust-Prevention Where Needed
Clear snow and ice from your outdoor fireplace within a day or two after a storm, because letting moisture sit will speed up rust and freeze‑thaw damage; grab a plastic shovel or soft broom, sweep gently around the firebowl, burners, vents, and the required clearance zone, and don’t scrape with metal tools that can nick finishes or loosen fittings. Heading: Gentle clearing — you’ll feel better knowing you’re protecting your gear; clear snow and ice, dry exposed metal with a cloth or low heat, and check seams, fasteners, and welds for fresh rust. Action: apply a thin coat of rust‑prevention oil to iron or steel parts after drying, reapply after heavy weather or every 6–8 weeks, touch up small spots with wax. Progress over perfection.
When to Call a Professional: Safety Red Flags and Recommended Services
When something about your outdoor fireplace feels off—like a strange gas smell, persistent smoke sneaking back into the house, or new cracks in the brick— don’t shrug it off and hope it goes away; you’ll want a pro to look at it sooner rather than later. Quick check: if you smell gas, hear hissing, or see soap bubbles on a line, shut the gas and call a qualified technician immediately, that’s urgent. If smoke keeps backing in, or you notice musty odors and poor draft, schedule Chimney Cleaning and flue inspection, a certified chimney pro can remove creosote. Cracked masonry, corroded burners, or storm damage also merit expert repair. Your fire feature needs care, maintenance makes certain safety and warmth, so contact us today for trusted service.
Some Questions Answered
What Is the Average Cost of a Fireplace Inspection?
The average cost runs about $75–$200, though regional variation can push it higher, especially if you need camera work. You’ll save some DIY savings by handling minor prep, but expect inspection add ons like sweeps or camera checks to raise the bill into the $150–$400 range. You’re not alone if it feels annoying, just take it step by step, get quotes, and prioritize safety over perfect fixes.
Can Chimney Repair Be Done in Winter?
Yes, you can do many chimney repairs in winter, though some jobs wait. Headline: what’s doable now. Technicians can handle flue work, roof flashing fixes, cap replacement and snow removal to stop leaks and hazards, but brick repointing or full waterproof coatings often wait for warmer weather, since cures slow in cold. You’ll get documented limits, temporary patches if needed, and follow‑up spring work. Progress over perfection.
What Is Included in a Fireplace Inspection?
A fireplace inspection checks the chimney cap, creosote levels, and flue draft, plus mechanical parts and safety. You’ll get a visual of the cap and crown, an interior flue check for creosote and obstructions, smoke testing to verify draft, and a look at dampers, spark arrestors, or gas components for leaks and function. You’ll leave with clear fixes, realistic priorities, and a sense that small steps keep your hearth safe.
How Often Does a Fireplace Need to Be Inspected?
You should get a professional inspection yearly, and more often mid‑season if you burn heavily or notice problems.
Heading: Friendly reminder — treat it like a car, you’ll keep it safer. Follow an inspection checklist, watch for seasonal hazards like creosote or rust, and ask for smoke testing when smell or draft issues show up. That helps fuel efficiency, keeps costs down, and builds confidence. Progress over perfection.


