
Evergreen care: watering and protection during winter — You’ll keep evergreens healthy with a few late‑fall deep soaks, slow enough to wet 6–8 inches of root zone, then only water on thawed, above‑freezing days when soil is truly dry; mulch 2–4 inches to insulate roots, pull mulch away from trunks, and add breathable windbreaks or burlap for exposed plants. Use anti‑desiccant sprays sparingly, shelter containers, check soil with a probe, and remember: progress over perfection — more tips follow.
Some Key Takeaways
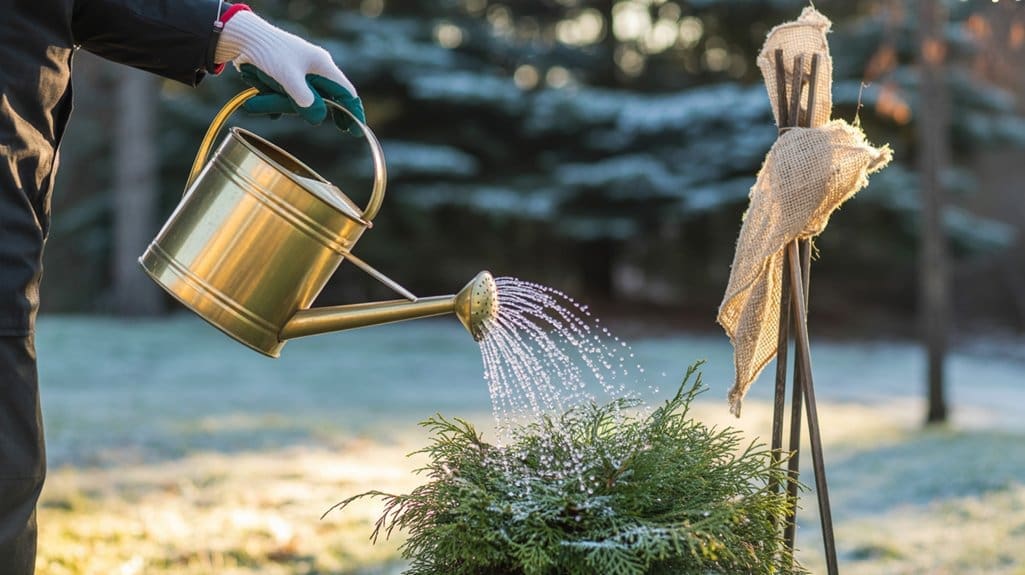
- Give a slow, deep late‑fall soak so soil is moist 6–8 inches deep before the ground freezes.
- Only water during thaws or mild above‑freezing days when soil at root depth is unfrozen and can absorb moisture.
- Check soil moisture by probing or digging to 6–8 inches; water only if that depth is dry.
- Apply 2–4 inches of organic mulch to the root zone (keep mulch 2–3 inches from trunks) to insulate and conserve moisture.
- Protect wind‑exposed evergreens with breathable windbreaks or burlap and consider anti‑desiccant sprays as a supplemental measure.
How This Guide Helps You Prevent Winter Burn (Informational Format)
If you want your evergreens to make it through the dry, windy months without that telltale browning, this guide walks you through the simple, practical steps that actually work, not fancy tricks. How this helps you prevent winter burn — you’ll learn to deep water in late fall with a slow 15–30 minute soak so the root zone stays moist and can feed foliage during dry spells. Lay 3–4 inches of mulch over the root zone, keeping it off trunks, to cushion freeze–thaw swings. Erect breathable windbreaks where winds hit hardest, they block drying without suffocating the plant. Use anti-desiccant sprays on broadleaf types on dry, above-freezing days, and check soil moisture, rewatering during thaws if needed. Progress, not perfection. Also consider protecting nearby concrete surfaces and planters with durable concrete paint to maintain outdoor areas while you care for plants.
When to Water Evergreens: Timing and Weather Cues
When the air starts to feel like it carries off your breath, timing your watering matters more than how much you fret about it; you want to keep roots fed until the soil itself gets too cold to help the plant. Heading into late fall, keep doing winter watering for newly planted, shallow-rooted, or wind-exposed evergreens, you’re protecting them from winter burn. Aim for a slow, deep root soak, 15–30 minutes with a soaker or root-level hose, to moisten 6–12 inches, not fluff on the surface. Water on mild, above-freezing days or thaws, and stop once the ground freezes, because frozen soil can’t replace foliar moisture. Progress over perfection: prioritize vulnerable trees, check before you water, and you’ll do fine. Proper weatherstripping and sealing can help maintain indoor humidity and protect home plant environments with energy-efficient sealing.
How to Test Soil Moisture and Know If Watering Is Needed
Think of checking soil moisture like giving your evergreen a quick health check—you don’t need fancy gear, just a bit of knowing where to poke and what to feel. How to test: push a probe or long screwdriver 6–8 inches into the root zone at several spots around the drip line, not just the trunk, and note resistance; if it’s hard to insert, the soil moisture is low and needs attention. Or dig a small test hole to that depth and feel the soil—moist soil clumps and feels cool, dry soil crumbles and feels warm. After you’ve done a deep watering, recheck to confirm water reached roots, and stop checking once the ground is frozen, rechecking during thaws. Progress, not perfection. Consider adding decorative pebble accents around the base to help retain moisture and enhance your patio’s look.
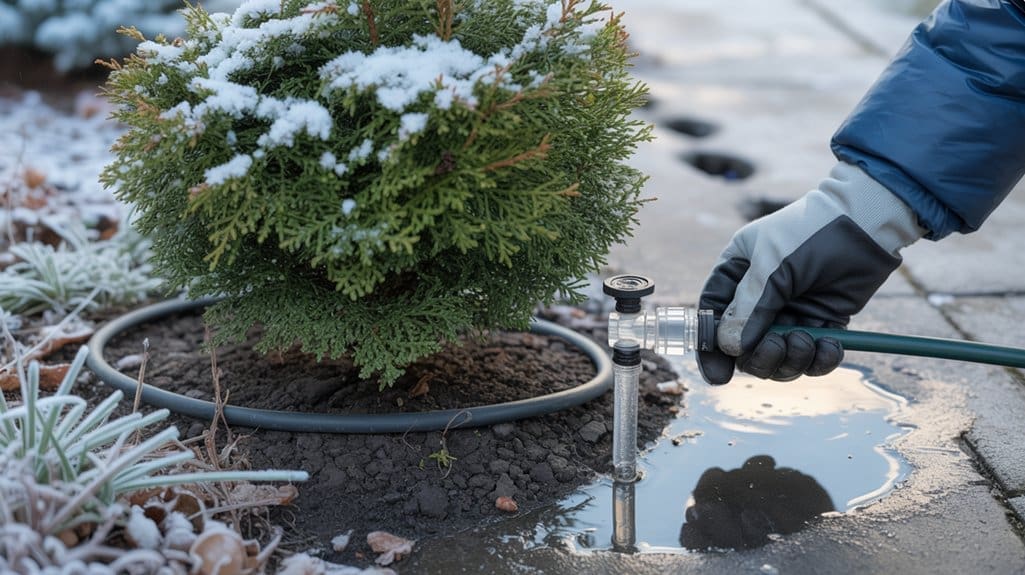
How to Water Deeply and Evenly Before the Ground Freezes
Before the ground locks up, give your evergreens a deep, slow drink so roots have what they need to ride out winter; you’re aiming to push moisture down 6–12 inches across the whole root spread, not just at the trunk. Heading into late fall, set a soaker hose or run drip irrigation for 15–30 minutes per station, or hand-water slowly, and focus on the entire drip line so the root zone wets evenly. Check by poking a screwdriver or digging 6–8 inches—if it’s hard to push or the soil’s dry, plan another deep soak. Watch soil temperature, stop once it’s consistently under about 40°F, because frozen soil won’t feed roots. Progress over perfection, you’ve got this. Transform your patio with durable landscape fabric to help manage moisture and reduce winter stress.
How to Manage Winter Watering When the Ground Thaws
You’ll want to water evergreens during any thaw that leaves the soil unfrozen, because roots will drink and need replacement moisture after cold, windy spells—aim for a deep, slow soak rather than a quick sprinkle so water reaches 6–8 inches down. Heading: When to water. Check soil moisture with a screwdriver or by digging, probe 6–8 inches, and only water if it’s dry there, otherwise you risk freeze‑thaw saturation and root rot. Timing: pick a warm, sunny day so water soaks and the surface dries before night, less ice, less stress. Priority: focus on newly planted and shallow‑rooted evergreens first. After watering, wait several days before applying anti-desiccant, reapply only if the old coating washed off. Progress over perfection. Many homeowners also enhance outdoor comfort and protection by adding pergola accessories like covers and heaters to their patio spaces for year‑round use, especially under pergolas and covers.
Mulch Correctly: Depth, Materials, and Placement for Root Protection
Mulch is one of the easiest wins you can give your evergreens — aim for 2–4 inches of shredded bark, pine needles, or leaf mold to insulate roots and hold moisture, and refresh it each year as it breaks down. Spread it out to the drip line when you can, but pull it 2–3 inches away from trunks and crowns so you don’t invite rot or rodents, and pick coarse, well-draining materials so the soil can still breathe. Put it down in late fall after the first hard frost, check in spring to rake anything touching the trunk, and remember: a little attention now saves you from winter stress later. Decorative stones can complement mulch and improve patio aesthetics while helping with drainage when placed around planting beds; consider using decorative stones to enhance your outdoor space.
Mulch Depth Guidelines
Think of mulch as a cozy blanket for your evergreens, one you’ll spread to protect roots from harsh freeze–thaw swings without smothering them; aim for 2–4 inches of organic material like shredded bark, pine needles, or leaf mold, and you’ll get insulation and moisture retention without the bad stuff. Heading: Mulch Depth Guidelines. You’ll cover the root zone out to the drip line when possible, but pull mulch back 2–3 inches from trunks to avoid rot and pests. Add it in late fall after the first light frost, and check yearly to top up thin spots, keeping the 2–4 inches steady. For new plants, stick near 2 inches so crowns aren’t buried. Progress over perfection—just keep it even. Consider using mulch around planter boxes and patio beds to enhance plant health and appearance while protecting roots planter boxes.
Best Mulch Materials
Now that you’ve got the right depth in mind, the next question is what to put down—because the material you choose makes a big difference in how well that 2–4 inch layer actually works. Best mulch materials: pick coarse, well-aged organic mulch like shredded bark, pine needles, or leaf mold, they insulate, hold moisture, and let water in. Avoid fine, compactible stuff that crusts and blocks infiltration, you’ll see fewer problems that way. Spread it out to the drip line so feeder roots get protection from freeze–thaw cycles, that extra width matters. Apply in late fall after the first hard frost to lock in moisture from deep watering. Pull mulch a couple inches from trunks, and breathe easier—progress, not perfection. Consider adding patio stone accents around mulched beds to enhance durability and tie the outdoor space together.
Proper Mulch Placement
If you want your evergreen’s roots to stay cozy through winter, place that 2–4 inch layer where it’ll actually help — spread it out to the drip line so most feeder roots get insulation, but pull it back about 2–3 inches from the trunk so you don’t invite bark rot or mice, and don’t pile it deeper than 4 inches or you’ll smother the soil. Heading: Proper Mulch Placement. When you apply mulch over the root zone in late fall, you insulate soil, cut freeze-thaw stress, and hold moisture, but wait until the ground cools so roots don’t push late growth. Spread mulch wide, a donut not a collar, pull back from trunks, and replenish annually as it breaks down. Progress beats perfection.
Build Windbreaks and Wraps That Actually Reduce Desiccation
When cold, drying winds start to sap your evergreens, a simple windscreen or loose wrap can make a huge difference, reducing moisture loss without smothering the plant. Build windbreaks with stakes outside the drip line, wrap breathable burlap loosely around them, and leave the top open so air moves while the fabric blocks prevailing winds — that cuts transpiration and helps prevent winter burn. Position screens to the windward side and offset from stems so nothing rubs foliage. For bigger shrubs, set a framed lattice a couple feet beyond the drip line, taller than the plant, to diffuse sun and wind. Skip plastic, pile trimmed boughs for small plants after deep watering, and remove wraps in spring. Progress, not perfection. Adding a privacy screen can also enhance the look of your patio while serving this protective function.
Use Anti‑Desiccant Sprays and Other Foliar Protections Safely
Foliar protection can be the last little boost your evergreens need after you’ve set up screens and wraps, so let’s look at sprays and other coatings that cut down on water loss without causing other problems. Heading: why and when. You’ll use anti‑desiccant sprays to reduce foliage water loss, applied as a late‑fall application on a dry day above freezing, after you’ve done fall watering so roots are stocked. Heading: do it safely. Read labels, dilute and cover evenly, avoid spraying on wet plants, don’t coat new growth, and test sensitive species. Heading: remember the limits. Use only on broadleaf evergreens, reapply after heavy washoff, and pair sprays with deep watering and mulch. Progress, not perfect. Consider pairing these treatments with a wood pergola or other outdoor structures to create a more sheltered patio environment.
Winter Care for Newly Planted and Shallow‑Rooted Evergreens
Newly planted and shallow‑rooted evergreens need a little extra TLC going into winter, because their feeder roots sit up near the surface where freezing and drying are real threats, so you’ll want to set up simple protections now to give them the best chance. Heading: prep and protect. First, give newly planted trees a deep soak in late fall when soil’s above about 40°F, run water slowly 15–30 minutes until it reaches 6–8 inches, repeat during warm thaws. Then apply 3–4 inches of mulch over the root zone, keep mulch 2–3 inches from stems. Add breathable wind protection—burlap frames or a windscreen on the windward side—leave tops open. Consider anti‑desiccant on broadleaf types, avoid heavy pruning, and monitor soil moisture with a probe. Progress over perfection.
Protect Container Evergreens and Moveable Plantings for Winter
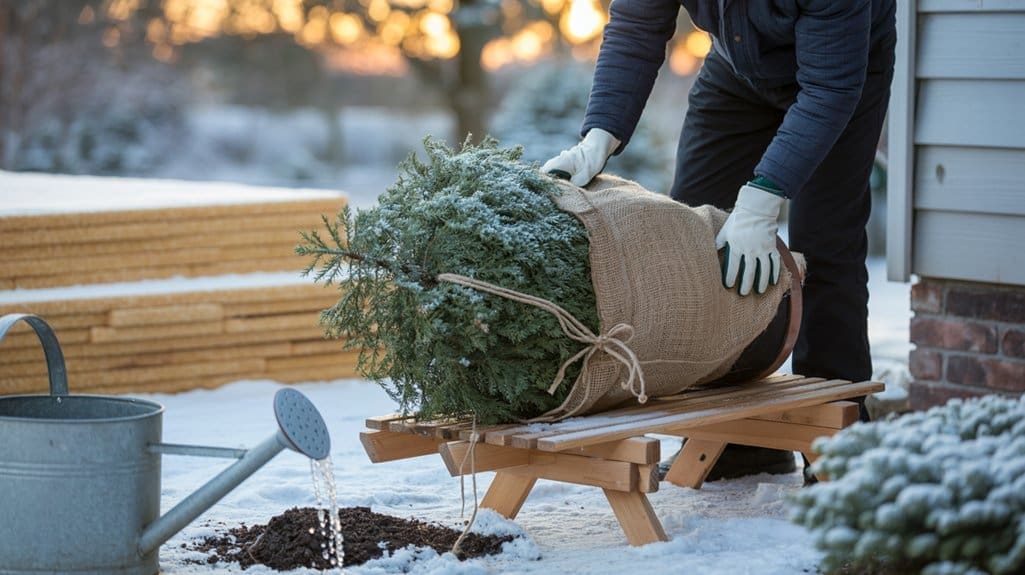
Protect Container Evergreens and Moveable Plantings for Winter: move your pots to a sheltered, south- or east-facing spot—like against the house or into an unheated garage—to cut wind stress and harsh winter sun, and group them together to create a gentler microclimate. Insulate the containers with burlap, bubble wrap, or foam and lift them onto foam blocks or mulch to stop roots from freezing and reduce freeze–thaw heaving, and remember to water deeply in late fall then check soil during warm thaws, because pots dry out faster than the ground. You don’t have to get it perfect—small steps like shelter, insulation, and consistent watering will keep most container evergreens much happier through the season.
Move Pots to Shelter
Move your container evergreens into a sheltered spot—think the south or east side of your house, or beside an unheated garage—so they get less drying wind and harsh winter sun, and you’ll cut down on the slow damage that zaps their roots and needles. Heading into winter, move container evergreens together in a sheltered south-facing location, you’ll create a microclimate that helps them survive. Wrap pots and insulate pots with breathable burlap or bubble wrap, and lift them onto wood blocks to avoid frozen ground. Water deeply in late fall, then check soil moisture during thaws and only water if the root ball is dry several inches down. Little steps, steady care — you’ve got this, your plants will thank you.
Insulate Containers Well
Insulating your containers well will make a big difference, especially on nights when the temperature swings wildly and the wind’s working against you. Heading: cozy the pot. You’ll want to insulate pots by wrapping them with burlap, bubble wrap, or R-value sleeves, which protects the root ball from rapid cold snaps and saves you worry. Heading: top it. Add 2–4 inches of mulch over the root ball to cut down freeze-thaw heaving, it really helps. Heading: group and lift. For big containers, group pots close together and raise containers slightly, put them on a platform and surround with straw or foam for shared warmth and drainage. Check holes so roots don’t sit in ice. Progress over perfection — you’ve got this.
Adjust Winter Watering
Often, you’ll need to water less, but you’ll also need to pay closer attention—container evergreens dry out faster than in-ground plants, and cold, windy spells can sap moisture from exposed roots even when the top looks damp. Quick heading: make a plan. Move containers to a sheltered, south- or east-facing spot, group them, and insulate pots with burlap or bubble wrap so roots don’t freeze. In late fall, water thoroughly until drainage holes run, then mulch soil surface with 2–3 inches of shredded bark or pine needles to slow freezes. During winter warm spells, check potting mix by probing 2–3 inches down, and if it’s dry, water deeply. Progress over perfection—young plants need the most care. You’ve got this.
Common Mistakes That Cause Winter Damage and How to Avoid Them
When you’re getting ready for winter, a few small slips — like waiting until the ground’s frozen to water or wrapping evergreens in plastic — can cost you big in spring, so let’s walk through the common mistakes that cause winter damage and how to avoid them. Common pitfalls: you’ll lose moisture lost from roots if you skip a late fall or early deep soak, and drying winds cause winter burn on exposed faces, so water while soil’s still warm and add winter protection. Don’t wrap foliage in plastic, and don’t pack burlap tight; use breathable burlap on a frame so air moves. Avoid heavy pruning or late fertilizer, keep mulch off trunks, and put up windbreaks for new plantings. Progress over perfection.
Some Questions Answered
Are You Supposed to Water Evergreens in the Winter?
Yes — you should water evergreens in winter until the ground freezes, because root hydration matters. Heading: What to do. Water deeply, 15–30 minutes or until root zone is moist, check soil moisture with a screwdriver, adjust watering frequency for new or exposed plants, and stop when soil’s hard. Use anti desiccant use sparingly, rely on snowpack benefits when possible, and focus on early fall conditioning — progress over perfection.
How to Protect Evergreen Trees in Winter?
Protect them by watering before freeze, mulching for root insulation, and setting wind barriers on exposed sides to cut drying winds, plus gentle snow removal when heavy to avoid broken branches. Skip late winter pruning—save winter pruning for spring—and consider shade nets or breathable wraps for sun‑scald and wind. Use de‑icing alternatives near roots, like sand or calcium magnesium acetate, and remember, small steps add up, progress over perfection.
How to Protect Potted Evergreens in Winter?
Picture your pot snug against a warm wall, burlap haloed around it; you’ll protect potted evergreens by improving container insulation, using root heating or grouped pots for shared warmth, and keeping mulch depth at 3–4 inches to slow freezing. Add wind barriers or loose burlap, clear heavy snow, consider pot burial for extra shelter, and water deeply before hard freezes, thawing, or dry spells. Progress, not perfection—you’re doing great.
What to Spray on Evergreen Trees in Winter?
Use a resin antitranspirant spray (like Wilt‑Pruf) on dry, above‑freezing days to reduce winter burn, reapply after heavy rain or a thaw, and avoid spraying new growth or when frozen. Skip foliar oils, insecticidal soaps, antifungal treatments, ice melt sprays, or systemic fertilizers in winter unless you’ve diagnosed a specific problem—those can harm or trap moisture. Do the basics, water deeply late fall, mulch, and aim for progress over perfection.


