What it is and why it matters: ice dams form when warm attic air melts roof snow, water runs down and refreezes at the cold eaves, then seeps under shingles and ruins ceilings. You’ll want to stop heat leaks first—seal gaps around chimneys, add insulation, and balance soffit-to-ridge ventilation—then keep gutters clear and use a roof rake or calcium‑chloride socks for short-term relief. Be safe, call pros for big jobs, and keep at it—there’s more practical how‑to next.
Some Key Takeaways
- Air-seal attic penetrations and add insulation to achieve at least R-30–R38 so roof stays uniformly cold.
- Ensure balanced soffit-to-ridge ventilation with baffles to maintain even roof temperature and prevent melt spots.
- Keep gutters and downspouts clean, install guards, and confirm downspout flow before winter to avoid obstructions.
- Remove excess roof snow with a long-handled rake from the ground and avoid stepping on icy roofs.
- Use calcium‑chloride socks to create melt channels through ice dams or hire pros for steam/heated removal when needed.
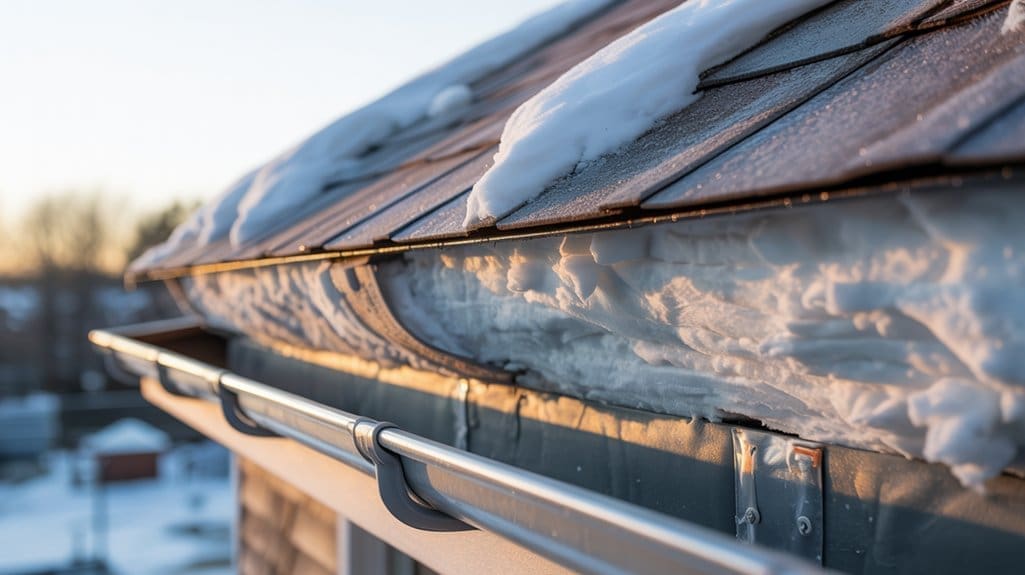
What Is an Ice Dam and Why It’s a Problem
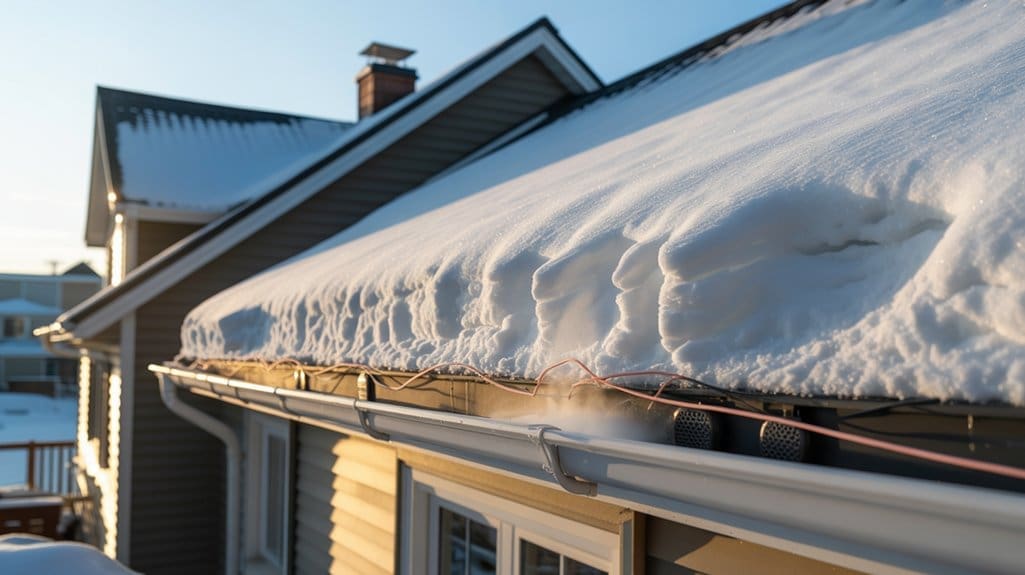
If your roof looks like it's melting on top while the eaves stay rimed in snow, you're probably dealing with an ice dam, and it's more than just a nuisance. What it is: a ridge of ice that forms at the roof edge or in gutters when warm spots on the roof let snow melt, then that meltwater refreezes where the eaves stay cold. Why it matters: backed-up water can seep under shingles, causing attic and interior water damage, stained ceilings, and ruined finishes. You’re not alone—this signals heat loss from living spaces, so improving roof insulation and attic ventilation helps. Persistent icicles and gutter clogging are signs to act. Start small, prioritize air sealing, add insulation, and be steady—progress wins. Consider using a leveling compound for patio projects to improve drainage and reduce nearby meltwater runoff patio drainage.
How Ice Dams Form: The Heat, Snow, and Roof-Temperature Mix
When warm air from your living space sneaks into the attic and heats parts of the roof, the snow up high starts to melt while the eaves stay cold, and that's the basic recipe for an ice dam. What happens next is simple cause and effect: warmer roof-surface temperature up top melts snow, meltwater runs down, then refreezing at cold eaves and gutters builds a ridge of ice. Often it’s uneven attic insulation and air leaks around chimneys or lights, plus blocked or missing ventilation, that create those hot and cold spots. You’ll get repeated melting and refreezing over days, and that’s how ice dams grow. Don’t worry — small fixes to insulation and ventilation help a lot, progress over perfection. Properly maintaining exterior waterproofing and using the right foundation sealer can help protect your home’s lower structure from damage caused by repeated freeze–thaw cycles.
How to Tell if You Have an Active or Developing Ice Dam
Start by walking the perimeter of your roofline and looking for contrasts, because those visual clues tell you most of what you need to know: a clear band of bare shingles up higher with snow piled below the ridge, a thick line of ice or long icicles along the eaves or in the gutters, or water pooling and dripping from the soffit — those are classic signs that warm roof areas are melting snow and the lower edge is refreezing into an ice dam. Next, check for pooled water, wet spots under the eaves, or fresh water stains inside, because trapped melt from freeze–thaw cycles means an ice build–up is blocking drainage. Look at gutters for clogging, sniff attic insulation and assess ventilation, you’re not alone in this. Also inspect downspouts and consider proper patio and roof drainage systems to prevent water backup and ice formation.
Short-Term Emergency Steps to Stop Leaks Now
Short-Term Emergency Steps to Stop Leaks Now: you can start by clearing the top 3–4 feet of snow from the roof with a long-handled rake from the ground, which quickly cuts off more meltwater feeding the dam and reduces pressure on your eaves. If melting’s needed, make a narrow channel through the ice with warm (not boiling) tap water or a sock of calcium chloride, and meanwhile protect the inside by catching drips in buckets, moving valuables, and only poking a small ceiling drain if water is bulging and you can do it safely. If the roof is steep or icy, don’t risk climbing — hire a pro with steam or heated tools, and focus on temporary fixes that buy you time, not perfect solutions. Consider using trusted roof sealant products to reinforce vulnerable areas and slow leaks until permanent repairs can be made.
Remove Snow Safely
If you can reach it from the ground, pulling snow off the roof is the quickest way to cut down the water feeding an ice dam, and you don’t have to risk life and limb to do it. Safe removal starts with a long-handled snow rake or roof rake, you’ll pull the top 3–4 feet straight down in short sections, don’t scrape along the roof surface or you’ll harm shingles. Clear gutters and downspouts from the ground so runoff has somewhere to go, and don’t climb onto an icy roof. If leaks continue, on a warm day you can gently spray from below or use calcium chloride in socks on the dam, or call a pro for ice dam removal. Progress beats perfection. Properly maintained patios and edges using paver sand can help manage runoff and reduce freeze-thaw issues around your home.
Make Ice Channels
Make ice channels when you need a quick fix to stop water from backing into your attic and you can’t wait for a pro or a warm day. Friendly reminder: work from the ground, you’re part of a team with your house. First, use a garden hose on warm-ish days to run water up toward the ice dam center and carve a drain path, don’t use boiling water. If needed, chip gently from below with a long-handled roof rake or chisel, never climb up. Drill 1/4–3/8" weep holes at the gutter line to let pooled water out, and consider a calcium chloride sock across the top to melt a channel slowly. Afterward, clear snow with the roof rake and plan attic insulation and better ventilation, plus regular gutter maintenance. Progress over perfection. Consider installing reliable gutter guard systems to reduce clogging and help prevent future ice buildup.
Protect Interior Temporarily
When water starts dripping through your ceiling, you want fast, sensible moves you can do from the inside to stop damage and buy time for a proper fix. Quick first steps: set buckets under leaks, stretch plastic sheeting to channel water away, and cut out wet insulation if you can, because soggy batting breeds mold and smells. Turn down humidifiers and run dehumidifiers and fans to dry the attic space, seal obvious attic penetrations with temporary foam, and improve ventilation where possible to slow condensation. From outside, use a roof rake to remove snow and, if safe, create melt channels with calcium chloride socks to relieve ice dams. You’re not fixing everything now, you’re protecting home and family until pros help. Consider keeping a basic roof repair kit on hand so families can respond quickly to common roof and gutter issues.
Safe Snow Removal and Gutter Care That Homeowners Can Do
Grab a long-handled roof rake and clear snow from the ground down to about 2–3 inches above the eaves, that cuts meltwater and lowers ice dams risk, and you’ll avoid scraping shingles. Check gutters and downspouts in fall and spring, and after leaf fall; remove leaves and twigs with gloves and a scoop, then flush downspouts with a hose to confirm flow. For stubborn ice, use calcium‑chloride pucks in a mesh stocking to melt channels—don’t chip at shingles. Never climb onto an icy roof yourself; call a professional contractor if on‑roof work’s needed. Small steps help; you’re not alone. Consider adding a protective surface cleaner routine for patios and walkways to keep outdoor areas safe and debris-free.
Air-Sealing and Insulation Fixes That Prevent Roof Heat Loss
Start by thinking like heat: warm air finds every little gap and will sneak out through your attic, melt the snow above your roof, and leave you with an ice dam dead ahead. Friendly tip: start with air sealing around chimneys, recessed lights, plumbing stacks, and top plates, using spray foam or caulk so air leaks stop the melt at its source. Then add attic insulation to at least R-30, R-38 if you’re in colder country, and box in or gasket the attic access to curb convective loss. Use blower-door testing and thermographic checks to find trouble spots, address thermal bridging, and seal kneewalls or duct chases. Coordinate fixes with soffit-to-ridge ventilation so residual heat vents out, progress over perfection. Also consider protecting your home’s outdoor spaces by maintaining clean gutters and installing gutter guards to reduce ice-related damage on patios and roof edges.
Attic Ventilation and Mechanical Considerations to Keep Roofs Cold
If you want your roof to stay cold and avoid ice dams, ventilation has to work together with your air-sealing and insulation, not against them — think of it as giving any leftover heat a clear escape route so it doesn't sneak up and melt the snow. Attic ventilation needs balanced soffit intake and ridge exhaust, sized to provide the right net free vent area for your attic, so airflow channel stays continuous above insulation, use baffles to keep it clear. After you air-seal and insulate the ceiling plane, check temperature uniformity with infrared or sensors during thaws. Be cautious with powered attic ventilators; they can pull warm moist air into the attic unless you add carefully matched make-up air. Progress over perfection. Seal Comfort helps homeowners find the right weatherstripping and related products to protect their homes and improve energy efficiency, including guidance on attic ventilation.
When to Call a Pro: Diagnostics, Structural Checks, and Contractor Tasks
When your roof’s at risk, you’ll want a pro to check the structure and run proper diagnostics so you’re fixing the real problem, not just treating symptoms. Have an engineer assess snow-load capacity before any big snow removal or heavy fixes, and get an energy auditor or insulation contractor to do blower-door and infrared tests to find air leaks and gaps. It’s okay if it feels like a lot—start with those checks, make targeted repairs, and you’ll reduce ice dams without guessing.
Structural Capacity Check
You’ll want to call in a pro any time the roof’s behaving oddly — sagging under heavy snow, new cracks showing up, or rafters that look strained — because those are signs the structure might be near its limit and DIY fixes won’t cut it. Structural capacity checks mean a licensed structural engineer or experienced roofer reviews your roof framing, compares actual and code snow load numbers, and confirms roof design and load capacity. They’ll check point loads from snow guards or added equipment, review as-built framing and span tables, and tell you if engineered approval and stamped drawings are needed. Ask for proof of licensure, insurance, and written results, because safety and peace of mind matter. Progress over perfection.
Diagnostic Air-Sealing Tests
Bring in a qualified pro for a blower door test to measure air leakage, they’ll report ACH50 so you see how leaky your shell is, then use infrared imaging during depressurization to spot leaks around chimneys, recessed lights, and knee walls. Ask for attic air-sealing plans, written scopes, and before-and-after diagnostics so you can track progress. Get ventilation verification and combustion safety checks too, so tightening the house won’t backfeed appliances. If you’re altering roofs or adding heavy fixes, pair tests with a structural check. Progress over perfection—small, targeted fixes add up.
Safety, Sequencing, and Post-Damage Drying/Repair Checklist
Before you start anything on the roof, keep safety front and center: icy roofs are slick, dangerous, and not worth risking a fall for, so work from the ground with a long-handled roof rake or call pros who’ve got fall protection and steam equipment, and don’t be shy about pausing work if conditions change. Safety first, always.
Start by fixing attic heat-loss—air sealing and adding attic insulation—so the thermal cause is gone before you chase surface fixes. After that, remove ice dams, clear gutters for proper drainage, use a roof rake from below, and check ventilation balance. If snow removal raises concern, stop and get a structural pro. Let wet materials dry fully with fans and dehumidifiers, confirm moisture drying, then repair cosmetics. Progress over perfection.
Some Questions Answered
Can Ice Dams Form on Metal Roofs and How Are They Different?
Yes — ice dams can form on metal roofs, but they act differently. You’ll see standing seam panels and hidden fasteners help snow shedding, yet thermal conductivity and metal expansion can melt and refreeze snow at eaves, causing seam corrosion over time and paint fading. Improve ridge venting and airflow, seal penetrations, and expect some shrinkage noise. Progress over perfection: keep vents clear and check seams, you’ll stay ahead.
Do Gutter Guards Increase Risk of Ice Damming?
Yes, gutter guards can raise ice dam risk if they cause gutter clogging or trap snow, increasing ice retention and water backup at the eaves. Check ventilation impact and roof slope, and confirm shingle compatibility, because poor fit worsens backups. You’ll want easy maintenance access, occasional clearing, and attention to snow shedding paths, so you’re preventing issues, not hiding them. Progress over perfection — small checks go a long way.
Will Attic Radiant Barriers Prevent Ice Dams Effectively?
No, attic radiant barriers won't effectively stop ice dams by themselves; they can cut some heat loss but won’t fix ceiling bypasses, thermal bridging, or poor attic insulation and air sealing. You’ll want balanced ventilation, upgraded attic insulation, tight air sealing, moisture control, and healthy roof sheathing, and then radiant barriers can help a bit. Start with the basics, make steady improvements, and don’t expect one quick fix.
Can Ice Dams Void My Roof or Home Insurance Policy?
Can ice dams void your insurance policy? Maybe, if you neglect maintenance and create clear negligence.
You’ll usually have insurance coverage for sudden water damage, but policy exclusions and maintenance clauses can lead to claim denial when ice dams stem from neglect. Keep documentation requirements in mind, photograph preventive measures, and follow roof care guidance, or insurers may cite negligence claims. Stay steady, do what you can, and document progress over perfection.
Are Heated Cables Safe Long-Term for Ice Dam Prevention?
Yes — heated cables can be safe long-term if you install them properly, follow maintenance needs, and respect electrical safety. Installation longevity ties to weatherproofing, thermal cycling resistance, and manufacturer warranties, so pick proven brands, ground properly, and replace worn sections. Expect some energy consumption, occasional ice shedding, and periodic checks, but with care they work well. Progress over perfection: inspect yearly, fix small issues early, and you'll feel steadier.