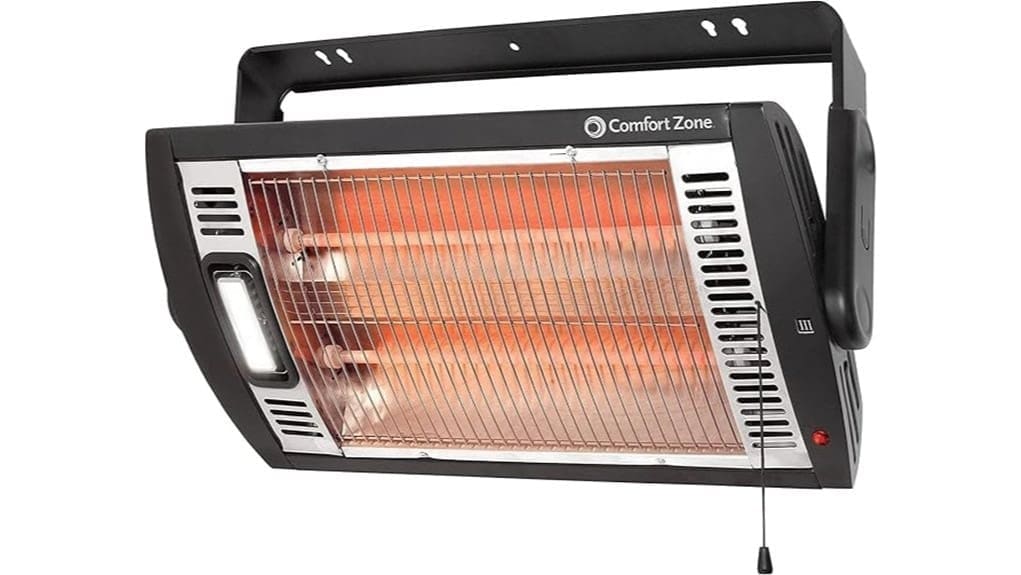

If you’re evaluating the Comfort Zone ceiling mount heater, you’ll like how it reclaims floor space by putting radiant heat overhead, while pull-string controls let you choose dual-quartz low vs high power and adjust halogen light from the ground. Low energizes at a reduced wattage for steadier, fuel-saving comfort during intermittent use. High ramps faster for quicker warm-up. Use the 90° tilt to target work zones and avoid uneven heating. Safety, stable ceiling mounting, a power indicator, and reliable overheat protection help too—stick around to compare setup and performance details.
Some Key Takeaways
- Ceiling-mount design saves floor space and positions radiant heat over primary work zones.
- Pull-string controls let you choose low or high radiant power and adjust halogen light separately.
- Dual-quartz elements provide low steadier, more fuel-saving warmth and high faster ramp-up to target temperatures.
- The 90° tilt helps aim the radiant field toward people and tools while minimizing disruptive hot spots.
- Safety includes grounded cord, secure structural mounting, and reliable overheat protection with an energization indicator.
Comfort Zone Ceiling Mount Heater Design and Installation for Garages
If you’re outfitting a garage or workshop, the Comfort Zone ceiling mount design helps you reclaim valuable floor space by shifting the heat source overhead instead of placing it on the ground. Use its ceiling mounting benefits to avoid heater obstructions near benches and tool carts, improving workflow. For workshop placement tips, center the unit over primary work zones so radiant output targets people and objects rather than open aisles. Mount to a structurally sound ceiling or joist, keep wiring clear, and use the 6-foot grounded cord to prevent strain. Verify the power indicator light confirms energization before testing both heat levels. This type of solution can complement door draft stoppers by reducing drafts that let warm air escape.
Dial In Heat and Light Settings With Comfort Zone Pull-String Controls
With Comfort Zone’s pull-string controls, you can dial in heat and illumination from the ground without climbing a ladder or stopping work. Pull once to select one of two radiant heat power levels, then fine-tune light output independently using the integrated halogen. Compared with wall switches or timed controls, this direct, user-driven adjustment reduces unnecessary runtime and supports energy saving thermostat options in practice. Because the unit tilts 90 degrees, you also improve ceiling airflow management, directing warm air near occupants while limiting stratification near the ceiling. Watch the power indicator to confirm operation. Winter readiness starts when you set safe, efficient heat right before the coldest days arrive.
Compare the Dual-Quartz Warmth Output Across Low and High Heat Levels
Comfort Zone’s dual-quartz radiant elements deliver different warmth intensities depending on the pull-string selection: low heat energizes the quartz output at the lower power level for steadier, fuel-saving comfort, while high heat increases radiant wattage to raise surface and target-zone temperatures faster. You’ll notice the Low high temperature range behavior clearly: low mode warms objects gradually, optimizing radiant heat distribution with lower peak output. High mode ramps power and increases photon flux, so nearby surfaces reach setpoint quicker and maintain higher local gradients. For intermittent occupancy, low prevents overshoot; for rapid warm-up, high wins. In colder-season setups, infrared comfort helps you warm people and objects directly rather than heating only the air, supporting a more efficient feel at lower thermostat settings.
Position the 90° Tilt to Target Your Workspace and Avoid Uneven Heating
When you set the 90° tilt, you control where the radiant field concentrates, so people and equipment heat evenly instead of only warming the nearest patch of air. Use ceiling airflow mapping—by observing how air currents move from vents, doors, and fans—to find the least disruptive zone for warm-up. Then use targeted radiant placement: aim the heater slightly off-axis toward your workbench line, not straight down center. Compared with fixed orientations, this reduces hot spots and temperature gradients across tools, keeping output consistent across low and high settings. Recheck angle after moving shelving or changing airflow paths, and consider integrating radiator reflector benefits from your setup to improve overall heat efficiency throughout the room.
Review Safety Features, Power Indicator, and Overheat Protection Reliability
Safety matters most in a ceiling-mounted heater because you can’t easily “reach” it after installation—so you should verify how the unit handles electrical and thermal risk during operation. The Comfort Zone prioritizes safe mounting with a stable ceiling interface and weatherproof housing that resists workshop moisture. You also get a power indicator light that confirms energization, helping you distinguish active heating from idle states. HVAC filter quality can also influence how efficiently a heater runs by supporting better airflow and reducing strain on the system. For thermal safety, the built-in overheat protection shuts the heater off when internal temperatures exceed design limits. Compared with models lacking explicit cutoff logic, this protection is more reliable under restricted airflow.
Some Questions Answered
How Much Area Can This Ceiling Heater Realistically Warm in a Garage?
Realistically, you’ll get spot-to-local-zone heating, not whole-garage warmth. For coverage, use garage heat output estimates based on your unit’s power and ceiling height; expect strong warmth within roughly a 100–200 sq ft area directly beneath, but rapid falloff at the edges. Coverage limits by insulation matter: if your garage is poorly insulated, drafts cut effective range, while better insulation stretches comfortable coverage.
Does the Halogen Light Produce Noticeable Glare or Harsh Reflections?
Yes, you’ll likely notice some glare, but it depends on mounting height and how reflective your garage surfaces are. The integrated halogen bulb adds useful task lighting, yet it can create harsh reflections on shiny floors, metal tools, and painted walls. In comparative terms, it’s brighter than many LED work-lights, so you should angle the 90° tilt for better Warm up distribution. The halogen output doesn’t affect humidity tolerance.
How Loud Is the Fanless Operation During Heating?
You’ll find it’s practically fanless during heating, so there’s no audible blower noise at typical operating temperatures—noise stays near background levels. That passive, radiant approach also avoids airflow losses, which supports heating efficiency metrics like faster spot warm-up of objects rather than the whole volume. You also benefit from energy cost savings because targeted radiant output reduces wasted heat, especially in garages where heat retention varies.
What’s the Recommended Mounting Height for Best Heat Coverage?
For best heat coverage, mount the heater so the radiant area targets your working zone, typically 8–10 ft high in garages. Adjust the 90° tilt to avoid wasting heat on the ceiling. Use thermostat placement considerations: set your thermostat where you actually occupy and avoid near-wall drafts. For airflow distribution tips, keep nearby obstructions clear and aim heat downward toward open floor space, not corners.
Will the Pull-String Still Work Reliably After Frequent Seasonal Use?
Yes, it’ll usually keep working reliably through seasonal reliability cycles, but pull string wear can accumulate after many cycles, especially with frequent tugging. You can extend life with simple maintenance tips: clean dust, avoid side-pulling, and inspect the string and latch each season. If the string frays or won’t latch, replacement options include swapping the string/cord assembly (if available) or replacing the heater’s control unit.


